
You will need:
New crayons - I used all the pretty colors from a box of 64 making 2 letters
Old crayons - for filler and practice
Frame - I used a $2.98 black plastic frame from Walmart. You could go more expensive. My only requirement was the the frame was thicker than a crayon so the crayons wouldn't stick out past the frame.
Razor blade knife - I'm not sure what these are called, but I think they cost about a dollar. The blade slides up and you can break off the tip to get a new sharp point. You could try other knives but when I explain my cutting method, you'll see why I like this one.
A cutting board - mine obviously needs a good bleaching!
Glue - I used hot glue but I think tacky glue would also work well
Paper - I used white cardstock...big enough to fit the frame
Letter - either printed or drawn. I used Elephant font and made it as big as it would fit on a regular sheet of paper. Then I adapted it to fit my crayon size and look right.
Pencil and Pen
Scissors
Whatever random box or book that will work as a flat surface and is nearby if you're doing this on the floor in front of the TV like I did.

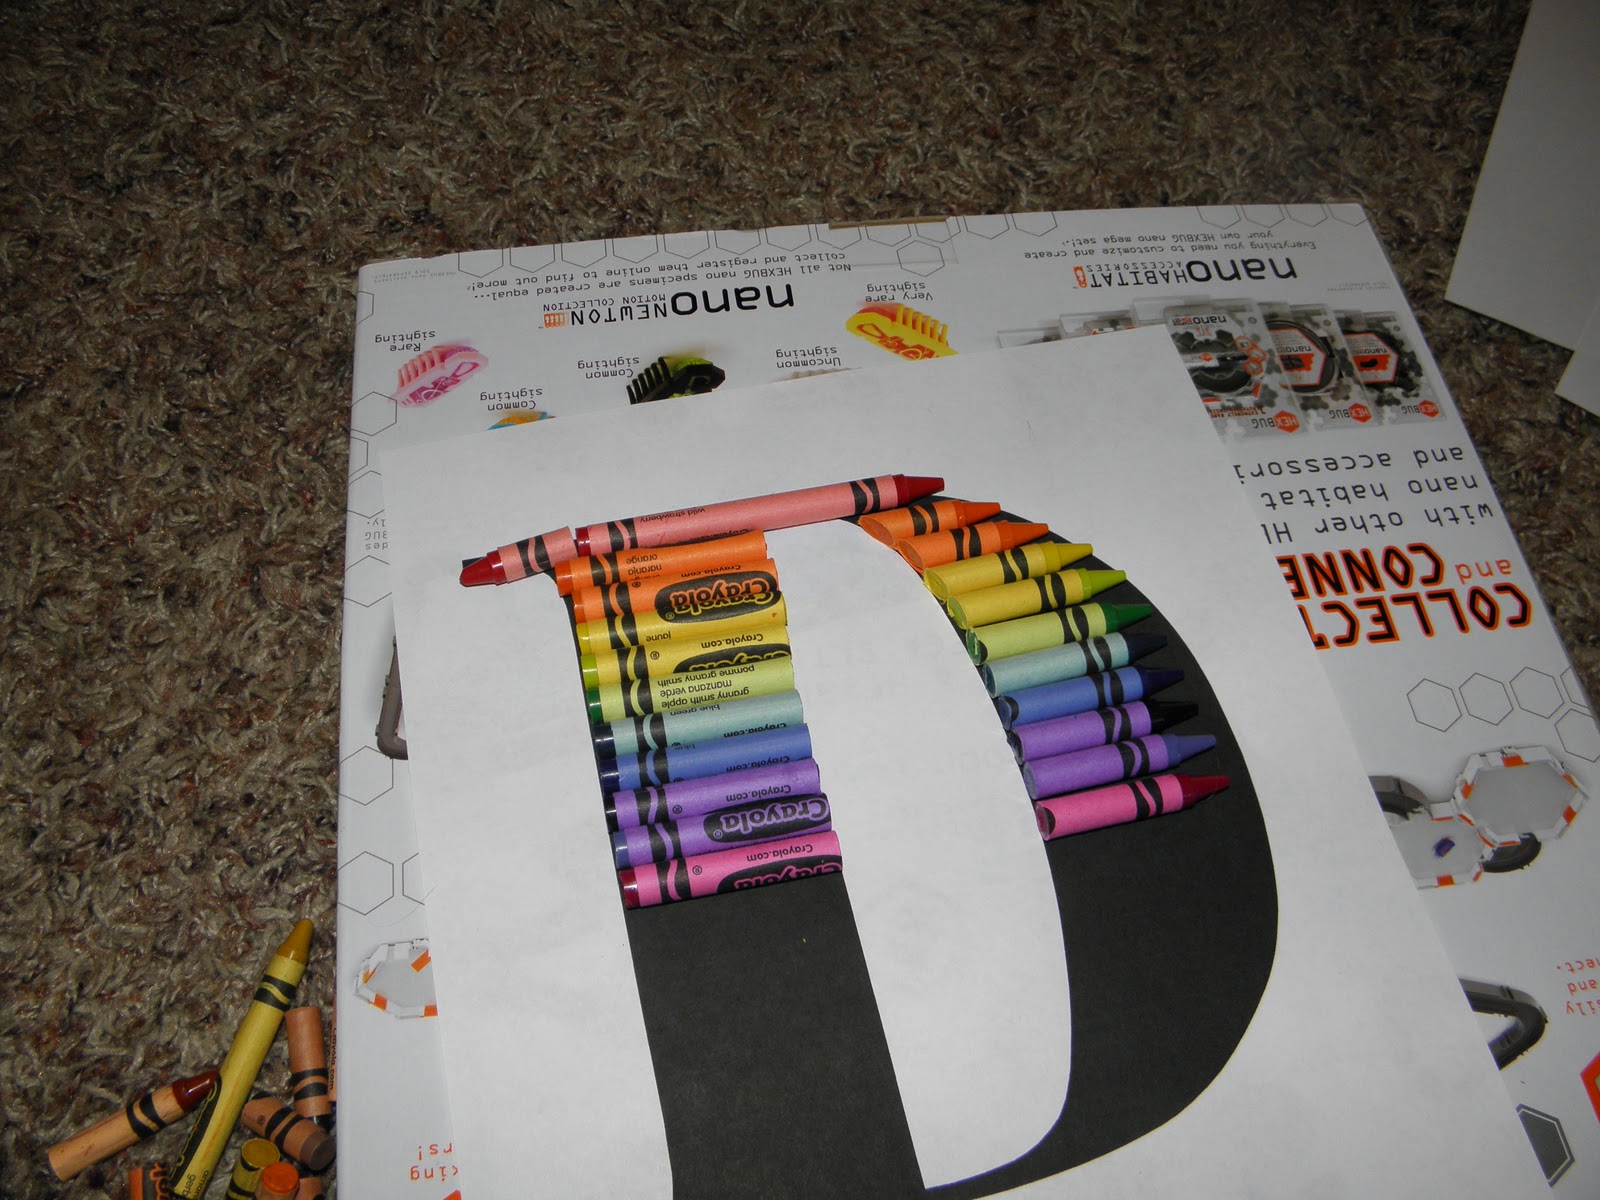
Start by laying crayons on the printed letter. I did a few tries with old crayons and brown crayons (cuz I wasn't going to use them in the finished letter) to get the spacing and the cutting technique down. With your razor blade out past the point that it's safe, but just right for rolling completely around the crayon, lay the blade across the crayon and use it to roll the crayon along the cutting board. Ideally your line will be straight and you will have cut through the paper all the way around the crayon. You will have also scored the crayon and it will snap right where you've scored it.

The angle cuts are harder, but I think they are what make the whole thing look more finished. I used a sawing motion to get through as far as I could and tried not to tear the paper. Only a few crayons gave my trouble. Most cut pretty easy, even on an angle.
Note: see the red tip at the very top of the letter. That's where the old crayon bucket came in handy. I found the same color of red to make the pointy part (serif, maybe?) stick out farther, since one crayon length wasn't wide enough.

Keep filling in, cutting crayons at different lengths. It's not shown, but up through about the green zone, there were middle parts of the crayon that were just thrown out. By the blue, I was using the whole crayon with just one cut.
You can see how I adapted my printed letter to fit the crayons better. I slimmed down the right front of the D. If I had left it full size, 1 crayon wouldn't have covered the full width.
At this poing I wanted to check how my letter was going to end. I used different crayon pieces to fill in spaces (on the left), but also paid attention to my rainbow pattern (on the right).

Using the cut crayons from the top section, I mirror imaged them from the bottom up. So, the orange crayon that was already cut at the top was used to measure and cut the periwinkle crayon at the bottom...and so forth, to make it symetrical.

Next I gently rolled the crayons off the D paper, keeping them in their places. Then I cut out the D, but narrowed it down quite a bit. I used this to lightly make lines on my white cardstock so I'd know where to glue the crayons. Each letter is different, but for the D, I really only needed the inside as a guide.
I think that a shadowbox frame would be really neat. However, I am cheap, so I didn't get shadowbox frames. I just put the white scrapbook paper in front of the glass (I did take the frame apart so that my paper is going behind the frame edges...thought I should add that in for the extrememly craftily challenged who may try this).

Time to start gluing. If you are using a glue gun, once the glue touches the paper, it's pretty much dry, so make sure you have it in place before you press down. Tacky glue would give you more time to adjust the individual crayons. Something else to consider is whether or not you care which way your crayon label faces. I just let mine fall randomly. I guess that depends on just how OCD you are. ;)
Note: About halfway down the right side of my D, I realized that my crayons were wondering back and forth a bit so I used my pencil as a straight edge to keep the rest in line.
Something else to keep in mind...as you are gluing your curved edge, it will matter which part of your crayon faces up. Line up the cut edge with the angle facing along the curve so that you know where to glue.

Not perfect, but not bad for my first try! In the final picture you'll see that I also added the teacher's name at the bottom. You could print this on the paper before you start. I wrote it lightly in pencil first and then traced over with a fine point sharpie.

I decided to do the C a little differently. I alternated the points of the crayons left and right. I think it turned out pretty cool too. You can see how I altered the shape of the printed letter here too.

Here are my finished letters. I still have a W to do. Might try it out of pencils since I used up all my good crayons on these 2!
Very neat tutorial! I have seen those crayon monograms and like them a lot. BTW, the knife is a box cutter, hobby knife or snappy knife.
ReplyDelete