Thursday, December 23, 2010

Teacher gifts


I had so much fun making teacher gifts this year! It started with the little Post-it Note thingie.

Then I decided to make some caramel corn. I was going to put it in bags, but kept forgetting to buy them when I was out. I had 3 oat containers on hand because I was supplying reindeer food for all 3 of the kids classes, so I improvised and turned them into containers for the caramel corn. It was fun to decorate them.
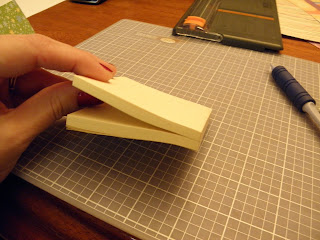
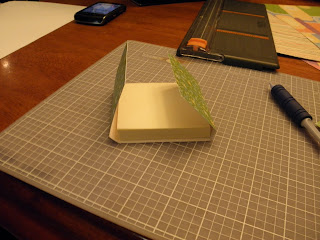
I started by cutting the containers in half. Then I cut verticle lines up the top half of the container so that it would nest inside the bottom half. The top half has that rolled over part that secures the lid.

After getting the containers the right size, it was just a matter of covering them with paper, ribbon and embellishments. I made a third, but I guess I forgot to take a picture of it.

Decorated hand sanitizer bottles were also included. Although this gift was more for the kids, I'm sure the teacher appreciates the killing of germs too! To make these, there's really only one tricky part - start with a bottle with smooth sides. A lot of bottles are funky shaped. These are from the Dollar Tree and are straight all around. Well, the front bumps out and the back bumps in, but it's still a flat surface to glue the paper to. After that, just use your imagination and make them fun. I had some black paper with silver guitars and thought that "clean hands ROCK!" was the perfect saying to pair up with it. My kids LOVE SpongeBob and they really liked that bottle too. I just used an image from the internet and cropped it to fit the size that I needed. I tried to come up with a third idea so that they'd all be different, but the creative juices must have been running low at that point.


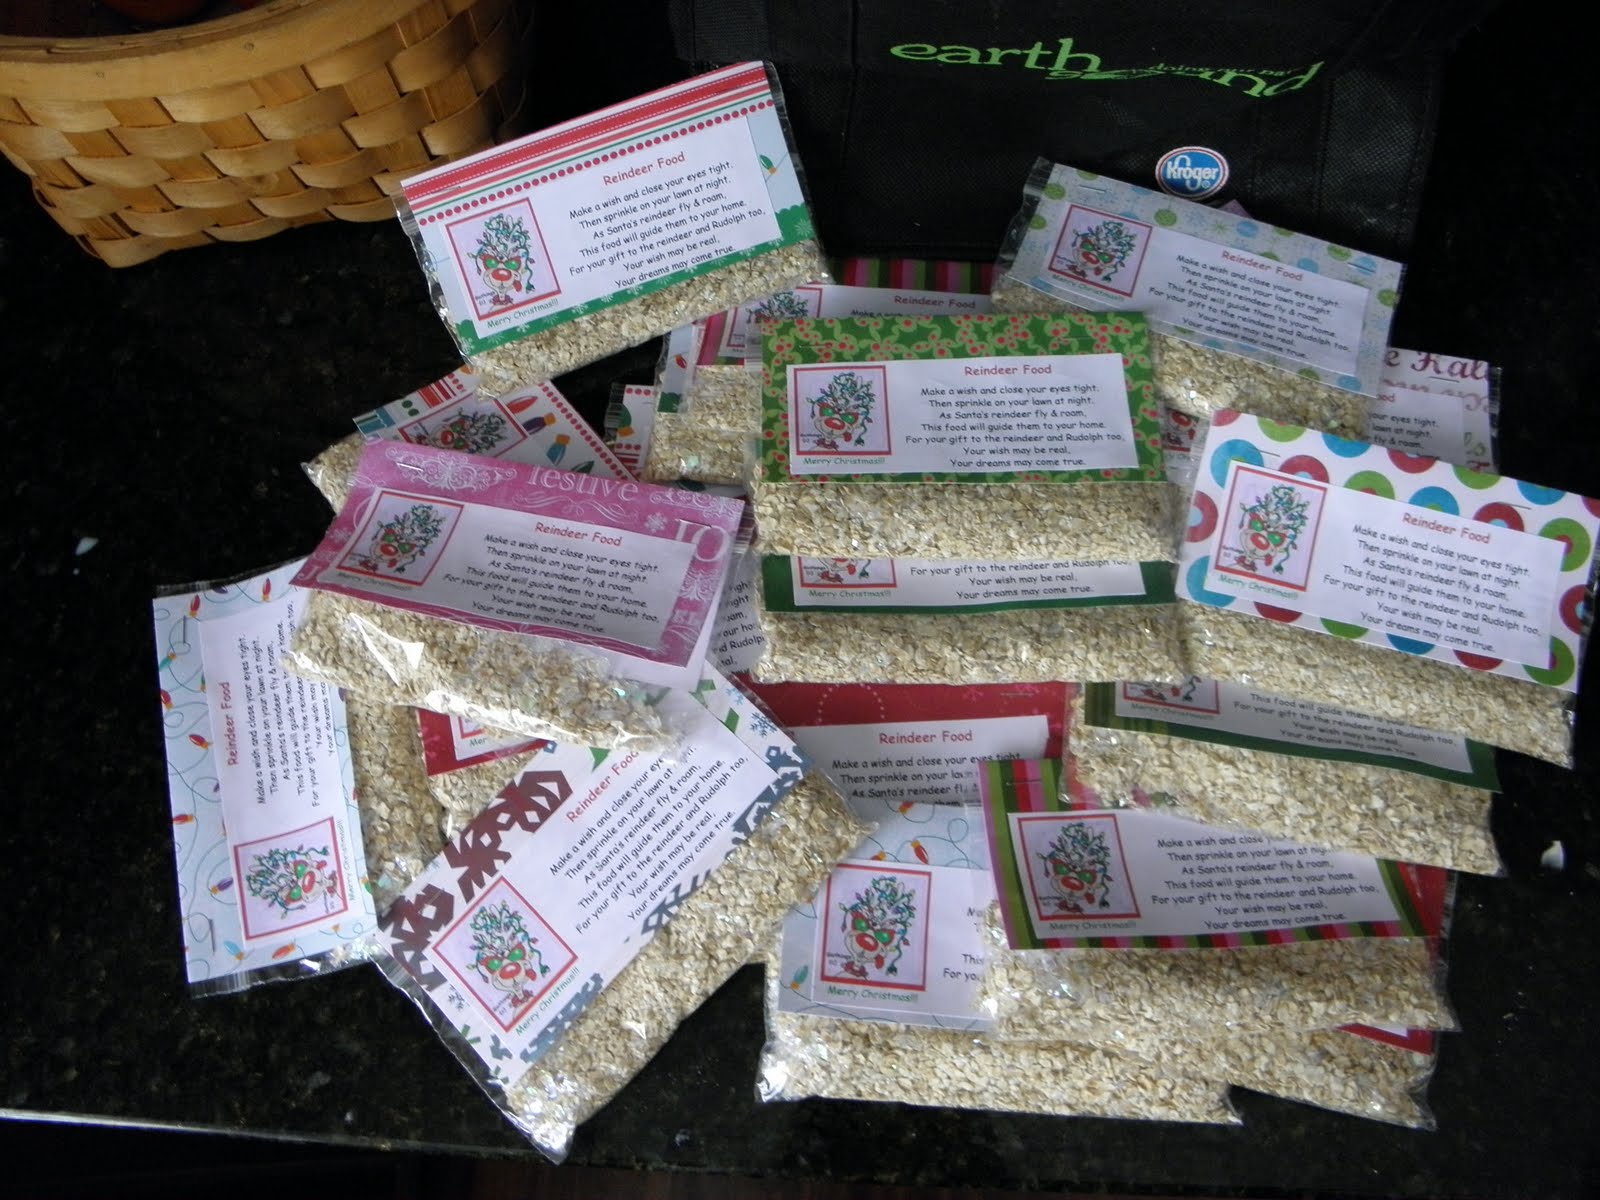
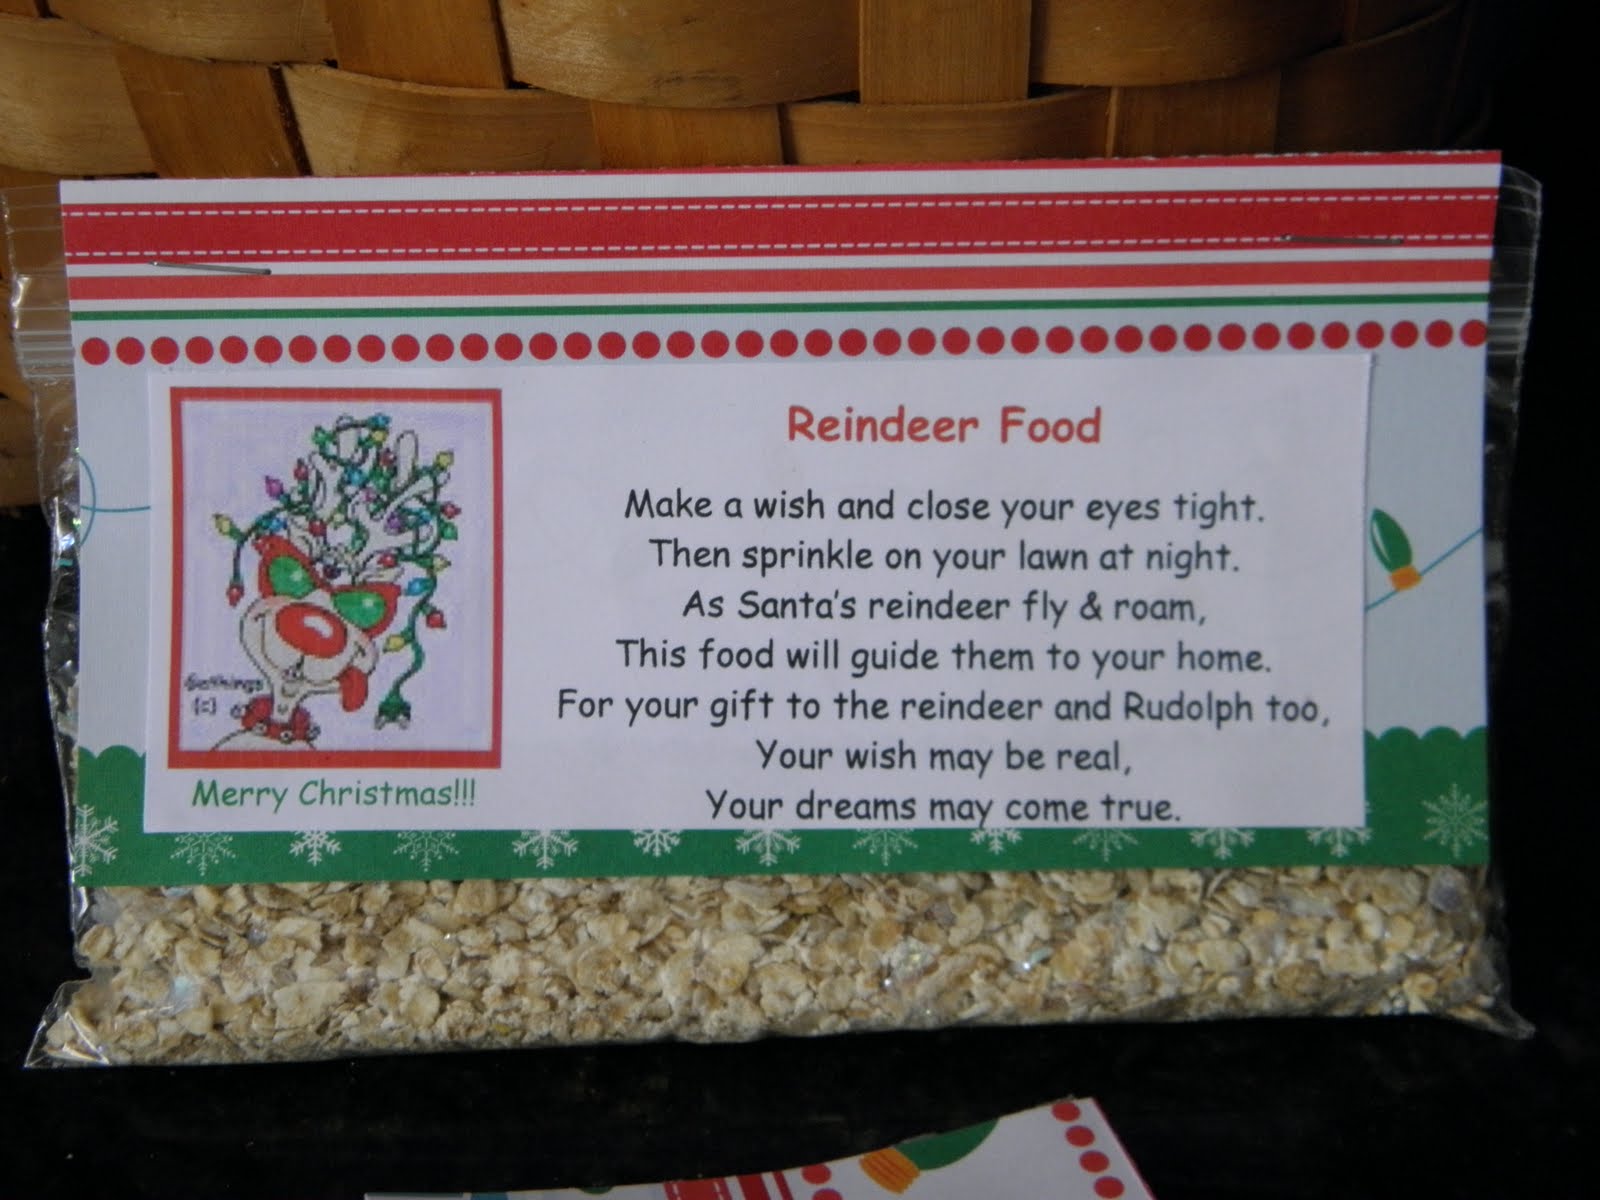
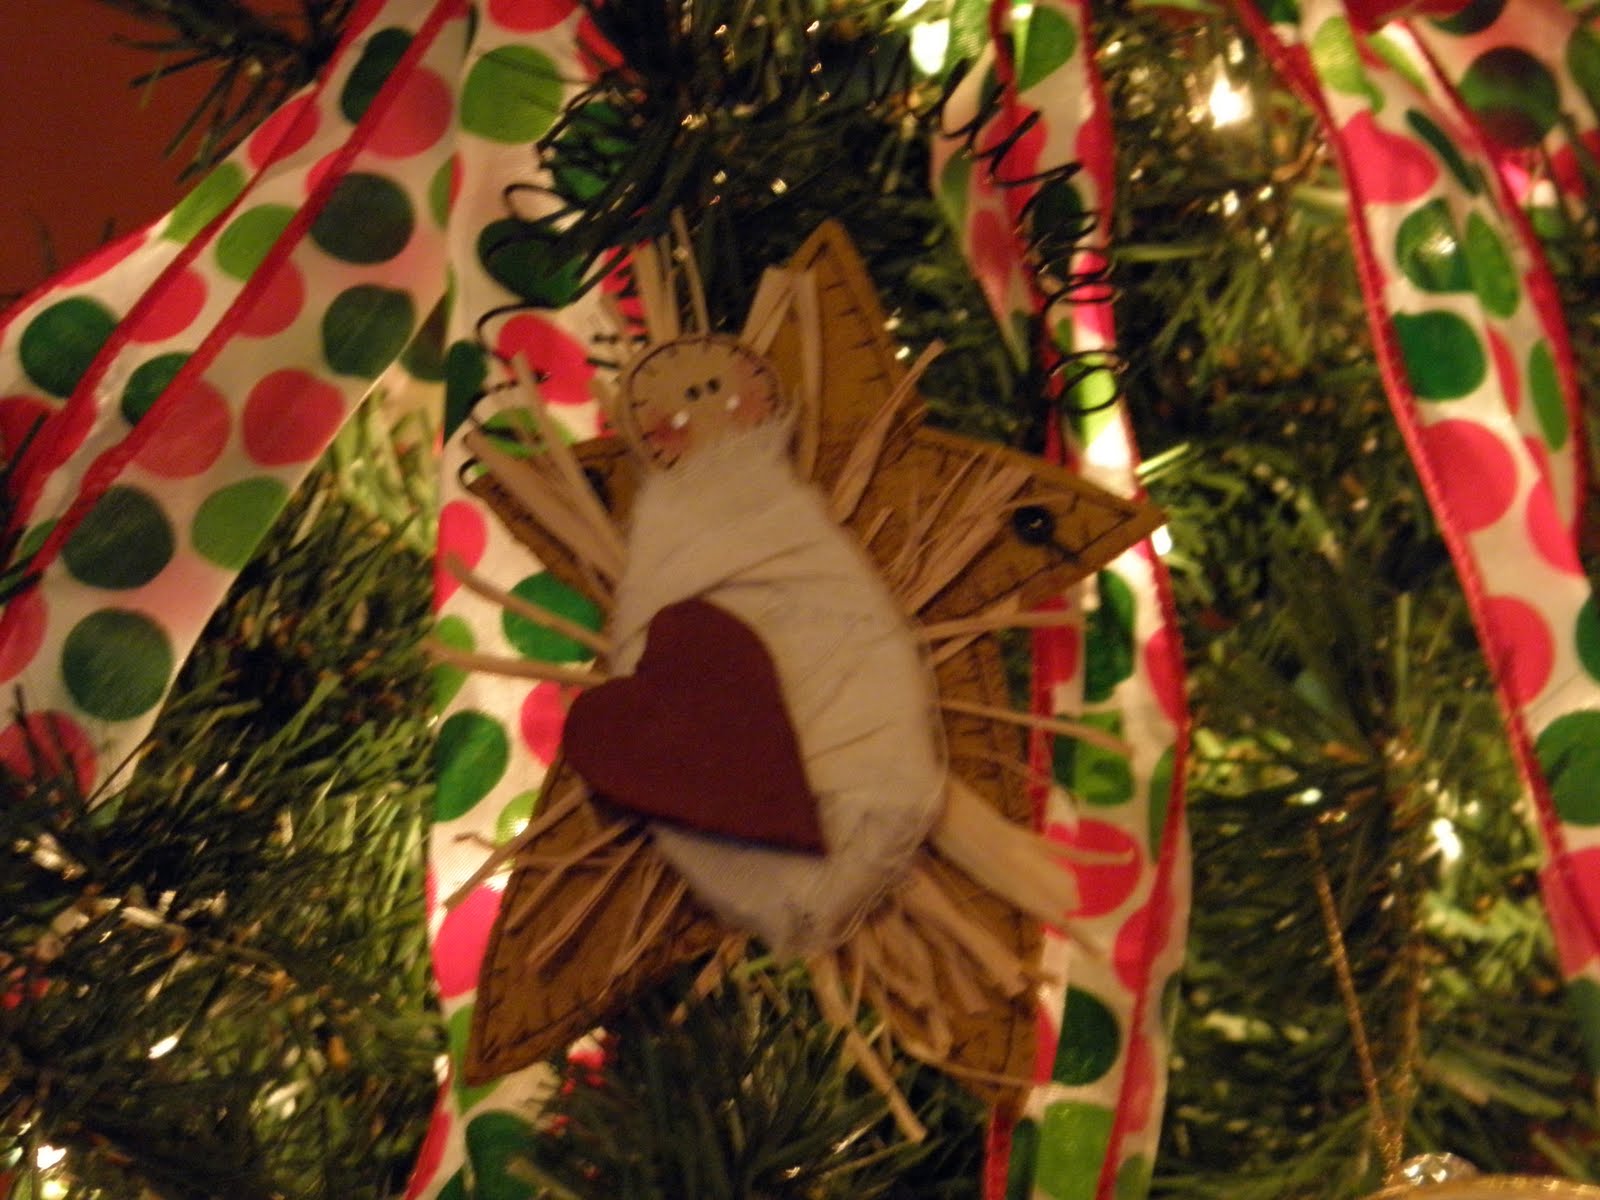
Here's the reason that I had so many oats. The pile is for 1 of the classes. The other 2 classes chose to make the packets as an activity during the party. It's oats and some type of glitter. You can use cake sprinkles or actual glitter. This year I had purchased some blizzard snow for the captured snowflake ornament that I made, so I just used the left overs from that.

I've seen these done in several different ways. One way is to fold a paper lunch sack so that the top is a triangle. Then fold it more than halfway over so that the triangle point faces down. This becomes the nose of a reindeer face. Then you staple "antlers" made of sticks or pipe cleaners on each side at the fold. Add some eyes and it's all set. I go the snack baggie route because they are a lot cheaper and easier to work with...especially when you're making 60!


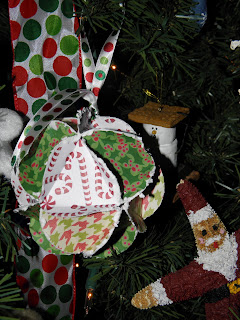
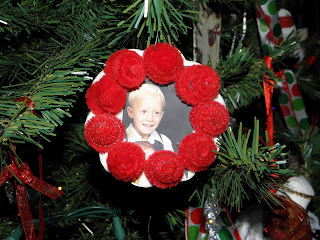
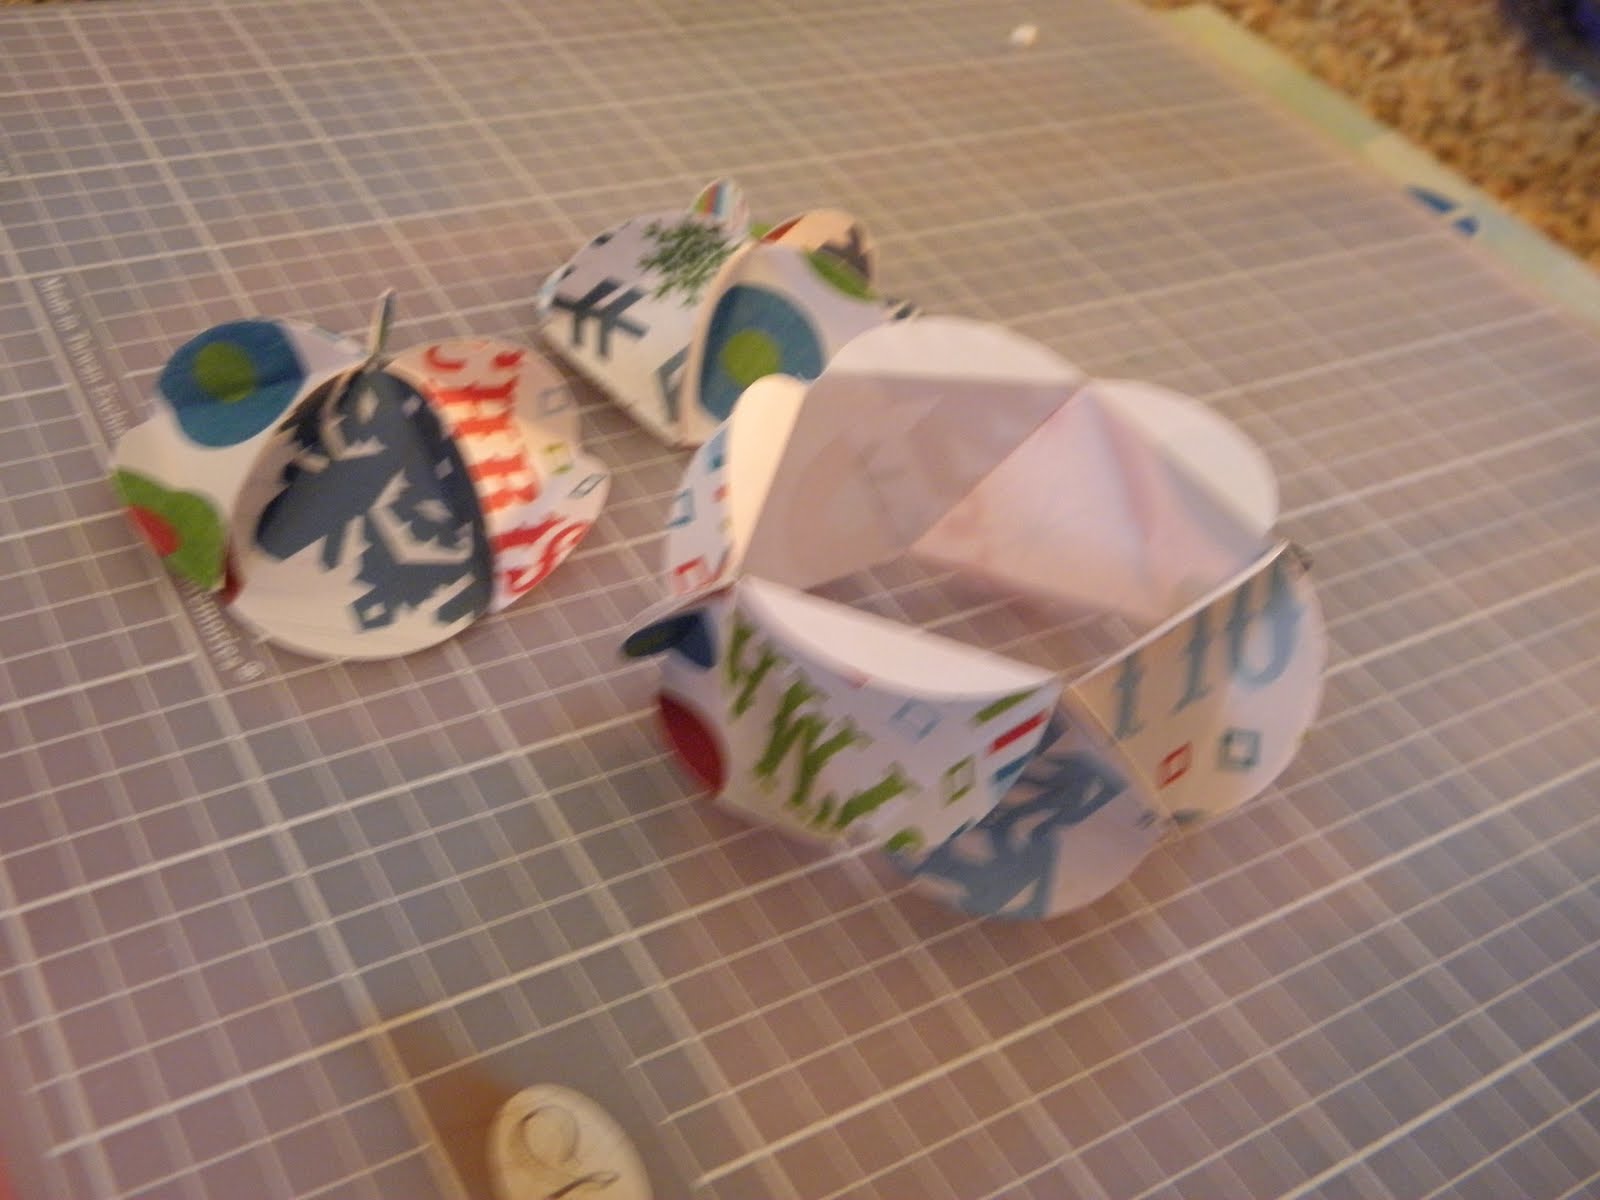
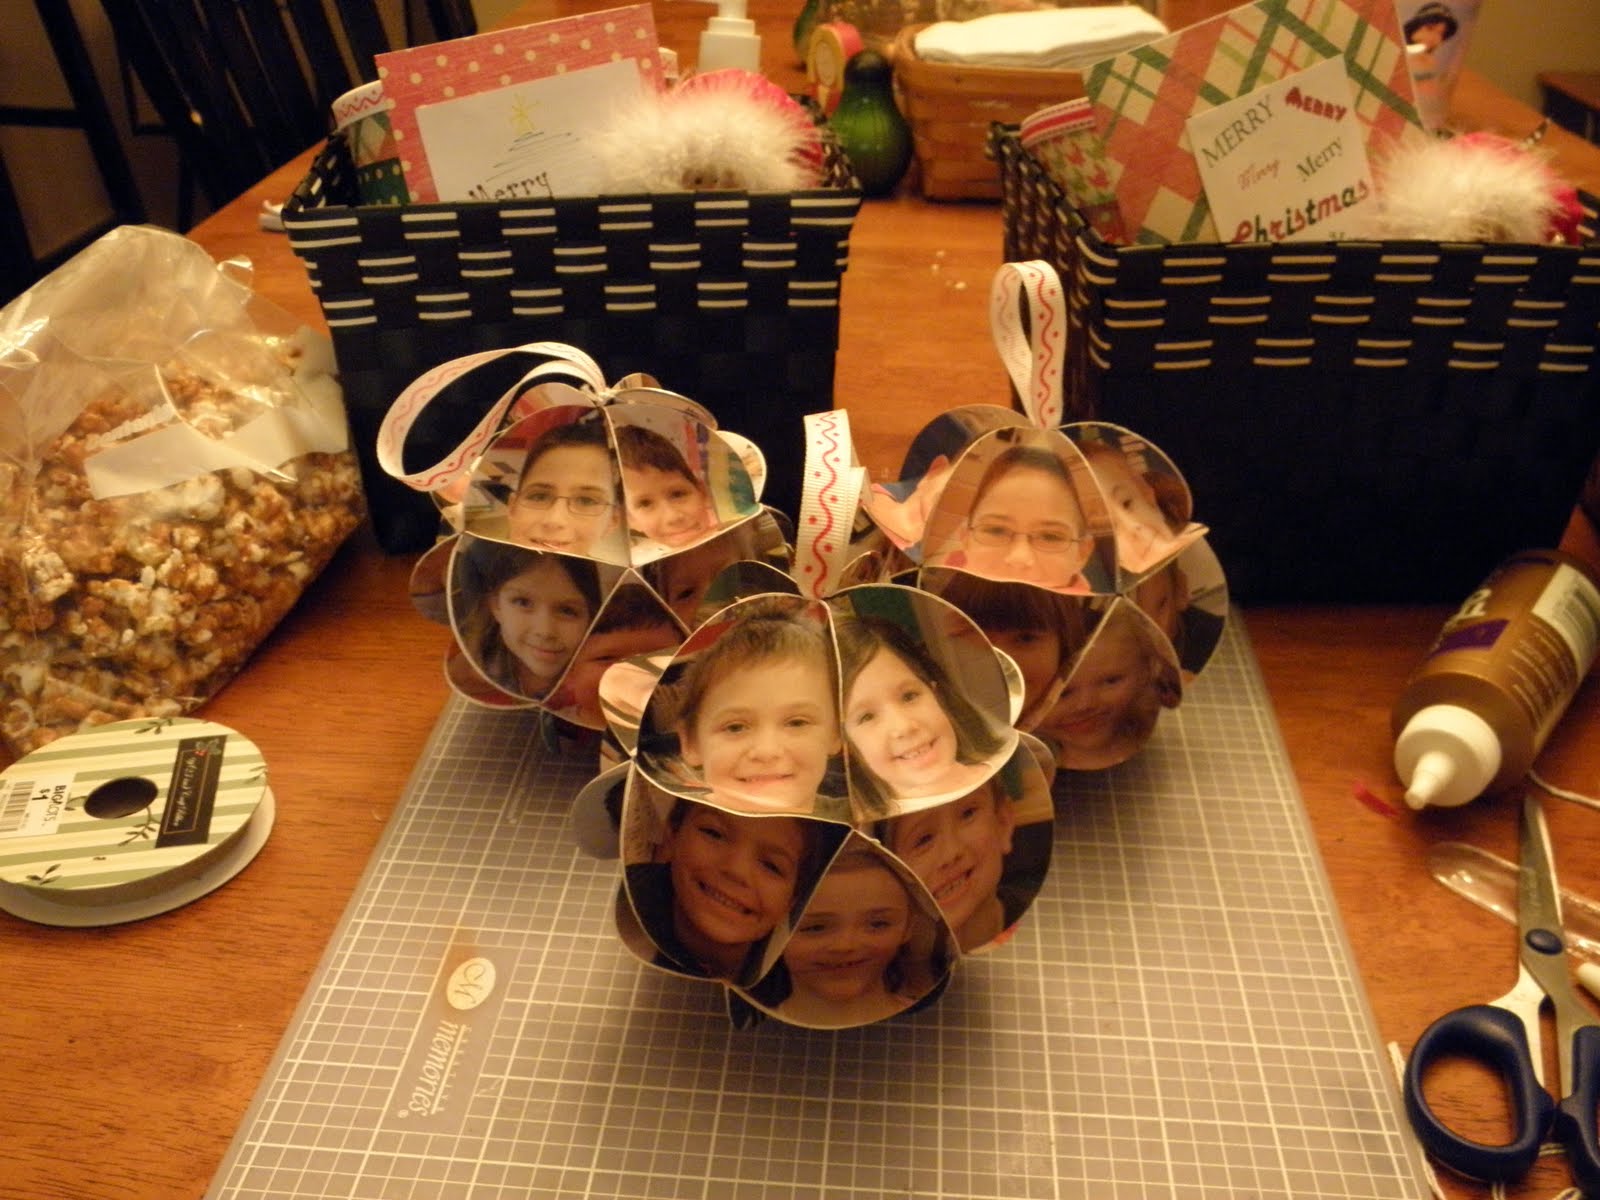
And, of course, the most awesome gift of all. I took a picture of each kid in the class and turned them into paper ball ornaments. To get them all the right size, I used photo editing software and cropped the faces into a 2.5" circle. I printed them on heavy paper/untextured card stock and then cut out the face circles for the ornament. The rest of it went together just like a regular paper ball ornament. The only tricky part is making sure that all the faces are "up". So, 10 of the 20 triangles should have the folded point at the top of the face and the other 10 should have the folded point at the bottom of the face. 5 "top points" make the top. 5 "bottom points" make the bottom. The remaining 10 alternate to make the middle ring.

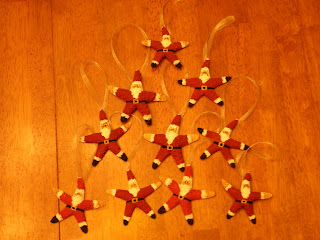
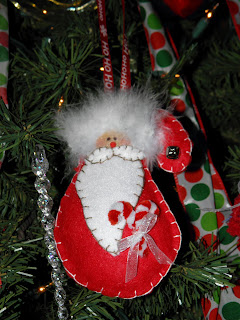
Lastly, I added one of the felt Santa ornaments that I made and I had the kids and myself each write their teachers a note of thanks. All the websites say that's what teachers treasure the most...and one of ours confirmed it.

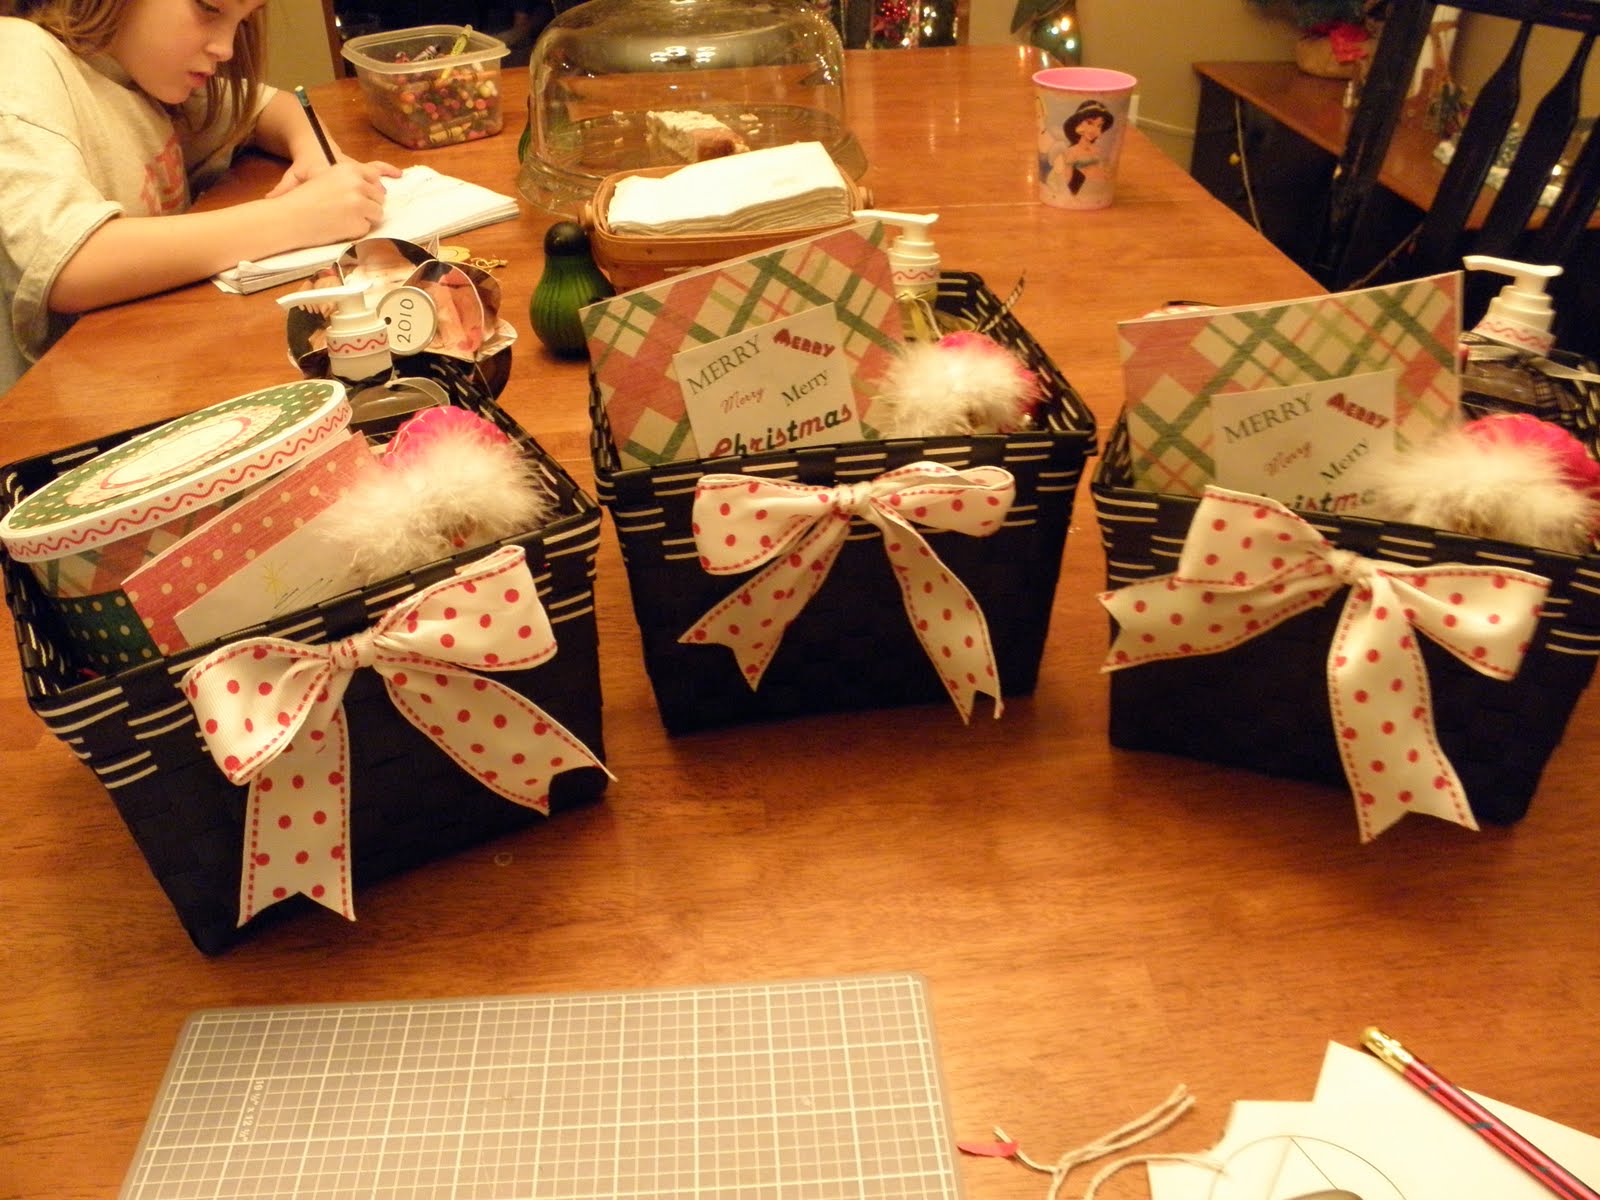
Here's the finished product. I got the baskets at the Dollar Tree and added a bow to the front. I wish I would have gotten a different size basket because everything didn't quite fit right into these and it didn't display as nicely as I'd hoped, but oh well.

So, all in all, I think I spent:
$1 per basket
$1 per sanitizer
$.50 per post-it set
maybe $1 each for the caramel corn supplies
$0 for the paper and ribbon - it came from my stash!

So, less than $5, but a whole lot of time and love went into them. I appreciate my kids' teachers and I hope these gifts help show that!

This is what my crafting area/dining room looks like when I'm done!

Sunday, December 19, 2010

Post-it holders


One of the teacher gifts that I made this year was post-it note holders. They cost me a whopping 50 cents each (not counting the paper or glue, which I already had on hand). They aren't anything super special, but they are pretty cute and have that fun home-made flair that turns 50 cents into a gift worthy of giving and receiving.

I got the idea from this site, but made a few changes. Here are my instructions.


Remove the backer from on set of post-its and stick it on top of another set. Add tacky glue* along the top of the stacked set and glue the backer paper to it. When it's dry, cut off the excess backer paper. I'm not sure if this step is necessary, but I figured it can only help to reinforce the top.

*Aileen's tacky glue is my new best friend. This Christmas I have used it to repair many broken ornaments and other decorations that I have previously glued with hot glue. While I also love hot glue, it has it's disadvantages. It does not hold well on smooth surfaces. It takes time to heat up and cool down the gun. Being the klutz that I am, I usually end up burning one or more of my fingers whenever I use it. However, tacky glue has none of these issues and while it doesn't dry quite as quickly as hot glue, it does dry fast and already has a tacky consistency (hence the name) so it grips pretty good from the get go.


Cut a strip of heavier cardstock type paper. It should be just slightly taller than the post-its and long enough to wrap around the post-its and overlap just a bit.


If you are not lucky enough to have a scoring tool and tray (or whatever it's called), then you'll have to improvise, like I did. Find something with a shallow groove - like a paper cutter - and something with a rounded point - like this tool that I have from Creative Memories. Line up the paper where the folds need to be and score along the lines. For this project you will need 4 score lines - 2 to each side of the post-its - so the paper will wrap around the post-it stack. To determine where these lines should be, just lay the post-its on the paper and make a mark to each side. Then turn the post-it pad up on it's side and make another mark at the proper thickness. Be sure to make the "thickness" marks equal on each side. After the score marks are made, fold your paper and check that it wraps nicely around the post-its, but do not glue it into place yet.

Momma needs a mani (and a pedi too for that matter!)

Now for the closure. You have a lot of options - velcro, string wraps, elastics, etc. I was going for simple and what was on hand, so I just used more paper with a flap. Cut an appropriate shape out of the paper you are using or a coordinating paper. With the paper wrap around the post-its, lay the cut-out on top to determine where it looks best. You will be gluing the cut-out to one side of the paper (the left) and making a flap for it to tuck into on the other side (the right). After laying the cut-out on top, make a mark on the right half of the paper, where the flap opening needs to be cut.


Cut the opening and then glue down the cut-out piece. Also glue the post-its into the wrap. Write a nice little note on the first post-it and Ta-da! You have a super cute gift ready to go!


Sunday, December 12, 2010

Part old, part new made to look old


This grate was in the ceiling of the kitchen in our house. It was covered over by the drop ceiling that the previous owners had installed and that we ripped out. Back in the day, it must have been how heat got from downstairs to upstairs. I'm guessing that it didn't work so well!!!
Greg took it down before he installed the new ceiling (Yes, I have an awesome husband who can do that sort of thing. Installing new ceilings, that is. Not taking down old grates. Ha!)
I was looking at it the other day, thinking that it would look really cool with something in front of it. So, I set it aside, with plans to make it cool some day. That day came sooner than expected.
When my girlfriends were over for the ornament exchange, I showed them the grate and told them about my plan, when suddenly I remembered a cross that I bought for $3 a few days earlier. It was black, which wouldn't work over top of the dark grate. Someone suggested that I paint it cream and scuff it up to make it look old. That's exactly what I did. Did you know that a nail file works just as well as sandpaper when you want to "antique" something but don't want to walk out to the garage in the cold? This picture is before antiquing.

I LOVE how it turned out. The more of this repurposed old stuff that I add to my house, the more I fall in love with it.


Here is it's new home in my home!

Ornaments

And here it is!!!! The BEST homemade ornament EVER (if I do say so myself...and I do)!!! During the ornament exchange, my sister pulled out a "special" ornament just for me. It was the original Baby Jesus ornament that I made and then gave them all away. It was so super sweet of her and I was about to tear up over it until she broke into the sweetness with a "now you can quit complaining about not keeping one of these for yourself!" comment. Sisters! HA! Love you Melissa!!!! You do have to admit that it really is awesome, right?!?!

I have made quite a few ornaments this year.

Ever wonder what 10 starfish would look like if they were painted like Santas? Well, wonder no longer. These are the ornaments that I made for the exchange this year. I bought the starfish 3 years ago in Daytona Beach on a trip that we made after Christmas. This was after the first ornament exchange and because it was fresh on my mind, and I had made Santa ornaments before, I bought the starfish in anticipation of making them the following year.

Funny story about them...at the store, I had picked out my 10 starfish and left them at the counter to be wrapped while we continued to shop. When we were done looking around the store, I went back to the counter to pay for my starfish, only to find they were gone. Apparently, there were 2 cashiers and 2 different people buying something that had to be wrapped. The cashier that wasn't the one I dealt with, sold my starfish to the other person! The really funny part is that they weren't there to buy starfish! What a surprise they got when they got home and opened the box!
So, back to the ornament saga! Like I said, I bought these starfish 3 years ago. However, for the following 2 years, I forgot that I had bought them until after I made my ornaments for the exchange. This year however, I remembered the starfish when it came time to plan for the ornaments. Of course, things never go smoothly, so although I remembered that I had bought the starfish, when we moved I packed them away "somewhere" and I couldn't find where that somewhere was. I figured that, being the logical packer that I am, I had to have put them with my Christmas decorations, but when I started searching for them I wasn't having any luck. I have 6 plastic storage containers full of Christmas decorations. Can anyone guess which box I found them in?!? That's right, the very last one. And by that, I don't mean the last box that I looked in because obviously I wouldn't keep looking in more boxes after finding them. I mean that I had to look through all 6 boxes to find the starfish and they were in box #6! But I did find them and the end result was very cute!

This is the "dolled-up" version of one of the paper ball ornaments that I posted about earlier. I added the ribbon hanger and some glitter snow paint along the seams. Pretty cute, huh? (BTW - see the little Santa poking his head out of the corner? That was my original starfish Santa. He's quite a bit bigger than the exchange Santas, but you work with what you've got!)


My sister found this paper star ornament idea online. Easy and fun. If you're dying to make it, comment on here and I'll post instructions. The picture doesn't do it justice - it's a lot cuter in person.

This Santa is probably the cutest of the ornaments that I made this year. He almost caused the starfish Santas to be delayed yet another year. But, after making one and realizing how much work he took, I went back to the starfish.

This is another "copied from the internet" ornament. Actually, I think they all are. Maybe not the starfish. I can't remember if I came up with that idea on my own or copied it from somewhere too. Probably copied it. I'm crafty and cool, but better at copying than actually making an original. The hardest part was getting the snowflake to spread back out after shoving it into the ornament hole. In the words of my crafting buddy, Angi, it's a bit "wonky", but still very pretty. The picture could be better, but I liked it best without the flash and there wasn't enough daylight at the time. You get it though. The "snow" in the bottom is iridescent. So pretty!!! The etsy shop selling them called it a captured snowflake. I think that's a pretty good name.

This ornament wasn't made by me, but it's one of the reasons that I make ornaments...because of the memories that go along with them. Pretty much every ornament on my tree has a memory or story behind it. Whether that story is that someone made it, someone bought it for me or that I got it for 75 cents when it was 90% off at Cracker Barrel after Christmas, there's a story that makes each ornament special. So, this one is my husband, Greg when he was probably about 4-5 years old. The red bobbles are coiled pipe cleaners. It's old and no where near up to my crafting standards, but it's one of the sweetest ornaments on my tree. For many years it hung on Greg's family tree. And it still does. We are his family now. Hold the phone! Does that mean that one day my daughter-in-laws are going to want all the picture ornaments of my kids? Not sure I'm prepared to think about that type of thing quite yet!

Merry Christmas Everyone! This year, make an ornament for someone you love!

Sunday, December 5, 2010

Cracker Mix, Wishbone and Tree


I got the recipe for this Cracker Mix from a co-worker, Lynn. Mostly it gets made around Christmastime, but Greg suggested that it should be made much more often. It is super yummy and not at all hard to make. You'll be amazed at how quickly a HUGE bowl will disappear!

Cracker Mix:
Crackers - Any will work - oyster crackers, Cheez-its, triscuits, wheat thins, small pretzels, etc. I forgot pretzels in this batch, but usually they are included. My favorite are the oyster crackers, but I even like the Cheez-its, which I won't eat out of this mix. I buy mostly generic (Kroger brand) crackers. I break the triscuits in half.

Break out your calculator and add up the ounces for all your crackers. For every 16oz. of crackers/pretzels, mix the following:
3/4 cup oil (I use Canola)
1/3 pkg Ranch dressing mix (the powder stuff in an envelope)
1/2 tsp dill weed
1/2 tsp garlic powder
1/2 tsp lemon pepper

Mix the crackers in a large bowl. Pour the oil mixture over the crackers and toss to coat. Layer the crackers on cookie sheets. Bake at 200 for 1 hour, stirring (aka slightly moving around on the cookie sheet, trying not to knock any off onto the bottom of the oven) every 15 minutes. Cool and store in an airtight container or ziploc bags. Cook in batches if you can't get it all on the cookie sheets in one batch.


Can someone tell me who wins when this is what the wishbone looks like after the pull? Claire and Gavin where on one side. Garret and I were on the other. We all pulled and the top went flying!


This cool aluminum tree was my Grandma and Grandpa Armstrong's. The base too. Every year I put it up, usually with red lights on it, which make it glow reflectively. This year, with the new house, I had to come up with new homes for all of our Christmas decorations. Mr. Aluminum Tree fit just perfectly on top of the buffet that I scored at the Salvation Army for $50 (on half off furniture day! WOOOO HOOOO!!!!)
For the first 5 years of the kids' lives, I took their picture and turned it into our Christmas card. On the 6th year I got lazy (and cheap) and just did the "e-card on Facebook" thing. Every year I take the pictures, cut them down and put their faces into an ornament frame. Kohl's has very accommodatingly sold triple packs of ornament frames every year. Maybe not just for me, but none the less, I appreciate the gesture and respond by buying a set of frames. Until this year the frames have been put on our regular tree with all the other ornaments. I've always been bummed by the way the frames blend in with everything else when the tree is fully loaded (and my tree gets VERY loaded!). This year I set the frames aside, not having a specific plan for where they would go, but knowing that I wanted them in a more special place than on the tree with all the other ornaments. By now I'm sure you've put 2 & 2 together, as well as noticed the picture, and realized that I found a new perfect home for all my ornament frames! My awesome aluminum tree now proudly displays all 21 (and counting) of the kids pictures. Greg and I shared many smiles as we looked at all the old pictures while I hung them on the tree. That reminds me...better get to working on a picture for this year. And I better make sure Kohl's didn't sell my frame set to anyone else yet!

Here's the awesome buffet that I got at the Salvation Army for $50! I've done nothing to it other than clean it up with some Murphy's and wipe it down with Lemon Oil. It's a beauty and fits perfectly into my dining room! There was an older mirror left behind in this house when we bought it. It has flowers etched into the sides and is sorta cool in a vintagy kind of way. I knew I wanted to keep it in the house, but never found the perfect home for it until I got this buffet. It hangs above the buffet now and they look great together!

Tuesday, November 23, 2010

My friend spray paint

Spray paint is my friend. It lets you take something outdated, worn, and just not cool anymore and turn it into something fresh and new that you are proud to display. Set me loose with a can of black spray paint and I'll cover up every brass surface in your home! I don't know why brass is no longer cool. Gold = rich, right? But alas, silver is cool, brass is not. I've given new life to several things in my home with the use of spray paint. An old brass picture stand spray painted matte black = cool! The ugly black floor grate for the cold air return on our furnace looks much nicer now that I painted it copper to match the vent covers. Not to mention how the interior of the opening in the floor beneath that grate almost disappears after I covered up the silver pipes with a coat of black spray paint. Anyhow, you get the point. If you don't like the color of something - spray away! If you don't like it when you're done - spray again!!! It's the easiest and cheapest way to make a change.

Back in the late 90's, I decided to sell Home Interiors. It was a big waste of my time. I'm a terrible salesman. I would sell the hostess only items to people if they really wanted them and not make them host a party. I would give discounts to pretty much anyone. I definitely was not a go-getter. But, I did get a ton of stuff to decorate my own home. This picture was one that I really liked. It has that Thomas Kincade feel with a nice mat and a substantial frame. In the late 90's it was very nice. Even into the early 2000's, I still liked it. But by the time we moved into our last house in 2006, it just never found a home because it didn't really match my style anymore. But, I hated to part with it because it is well made and I could see that it had potential to still be something cool.

About the time that we were getting ready to move to our new house in 2010, I saw a black and white picture of a tree in a local florist shop's window and thought it was super pretty. It got me to thinking that a tree picture would look really cool in my new living room. When I came across this picture again as I was packing, it all came together in my mind! I could just see a spray painted frame and mat with a black and white picture of a nice, fat tree. The only thing I was missing was the tree picture. I am lucky enough to have a friend who is a super talented photographer and when I mentioned what I was wanting to do, she was not only willing to take the picture for me, but she was excited to do it! She texted the picture of a couple of trees to me until she found THE tree. She did some photo mojo on it to make it even more cool and eventually I got around to ordering the print from her.
The print was delivered and it didn't take me long to break out the spray paint! Please learn from my stupidity and do NOT use spray paint outside on a windy day! You will get little particles of grass stuck in your spray paint. DUH!!!! Luckily no major grass pieces got stuck and nothing was ruined. Before I completely messed everything up, I moved my operation into the garage...where I should have been from the get-go. Anyhow, here are the astounding results! This picture is now proudly hung in my living room. Who says I'm not "green"?!

Friday, November 12, 2010

Christmas time is coming


Tis the season for Christmas crafting!

For the past 4 years, I have hosted an ornament exchange. Just like a cookie exchange, each friend brings enough homemade ornaments to share one with each of the other guests. Usually the group ends up having about 10 women. So, each year I get at least 10 new homemade ornaments for my tree! We do it as a carry-in brunch. In past years there have been about 400 kids running around while we try to share our ornaments and eat some food while visiting. This year, there will only be a few kiddos as many moms in the group have remained as all of our kids have grown and are now in school. Hopefully this year there can be more visiting and less kid chasing, especially since this house is not nearly as kid friendly as the last.

I hope to keep the tradition of the ornament exchange for many years to come! I get so excited looking for ornaments to make.

The first year was the absolute best for me (if I do say so myself). I made cinnamon ornaments...but not just your average cinnamon ornaments. These were quite possibly the best (and most involved) cinnamon ornaments ever. I started with a large oblong star shaped base, which I lightly dry brushed with a mustard yellow and outlined with dashes and dots, to give it that country flair. Set a-kilter on top of the star was a large burgundy painted heart. And on top of the heart was a cute little baby Jesus (complete with a rosy cheeked painted face), wrapped in swaddling clothes (strips of muslin - I joked and called him mummy Jesus) and laid in a manger (pieces of raffia fanned out behind him). And no ordinary hanger would do for this ornament. I used a twisty wire loop. This was by far, one of my best crafting endeavors ever. Lots of time, creativity and hot glue were used on these ornaments. I was so very proud of this ornament that I wanted to share it with everyone possible. And in my pride, without realizing it, I ended up giving away all of these amazing ornaments without saving one for myself. :( No awesome baby Jesus ornament hangs from the branches of my tree. Some day I will have to try to make this ornament again so that I will have one for myself. But I don't know if I can ever replicate the first try.

Every year there are stand out ornaments at the exchange - my sister always wows, one year with a layered paper ball (which were so awesome but also so time consuming that she never would have completed them all without her loving sister's help - lol), another year with the cutest little felt gnome - because some people just have it in them to craft. They can turn scraps of paper or fabric or random stuff from around the house (cinnamon and hot glue!) into something really cool.

Some ornaments aren't stand out for their crafting skill level, but they are loved by me just as much. Something about everyone taking the time to make an ornament for everyone else, knowing the love that we all put into our ornaments, just makes me feel happy as I hang all that love onto my tree each year and think of the people who made the ornaments for me. Also some Christmas magic must come into play by tying all the memories of the time we spend together during our exchange into the felt and paper and glass of the ornaments.

As I started looking for ideas for this year - and I have found quite a few - I came across a paper ball that I thought was really cool and decided to try making some. It's not THE ornament for this year, so I'm going to share it here. We all try to keep our ornaments mostly secret until the exchange. Although, as I was searching yesterday I came across one really cool item on etsy that I had to share with my friend, Angi and wouldn't you know that it just happens to be what she is making this year! She and I are definitely sisters in crafting!

If you want to make a paper ball it's pretty simple and only a few ingredients are required:
Paper - enough to cut 20 circles of whatever size (1" to 2" is best)
Circle cutting tool - a punch would be easiest, if you have one. I used my Creative memories circle cutters. Or you could even go old school and print or trace the same size circle onto your paper and cut it out with scissors.
Glue - I used Aileen's Tacky Glue and it worked great.
Hanger - ribbon, string, etc.

1. Choose your paper. Completely up to your taste for the colors, patterns, etc. The only stipulation is that it should not be too heavy or the folds will be hard to make. I just used standard scrapbook paper.

2. Cut your circles. 20 of the same size circle make one ball. 1-3/8" circles made about a 2-1/4" ball. 2-1/8" circles made an almost 4" ball.


3. Fold your circles into equilateral triangles (you remember that term from 8th grade geometry, right? It means same length sides...or at lest that's what I remember.) This might be a little tricky at first, so make an extra circle that you can adjust your folds until they look right. I'm sure there's a template online somewhere, or you could paste a triangle over/inside the right size circle in Word to get the size right, but I found that it wasn't too tough to eyeball it. They don't have to be perfect, but they do need to be pretty close.
After you have the first circle folded nicely, just lay it onto another circle, back to back, and use it as a guide for all the other folds.

4. Glue your circles together on the folded flaps. Start with 2 sets of 5 in a circle/cone. And then make a straight strip of 10 into a ring. Lastly, glue all 3 parts together to form the ball.


5. Embellish! I haven't done this part yet, but I saw several ideas online. Ink the edges, spray with glitter/shimmer, add rhinestones at the connection points, or whatever else sounds fun!

6. Hang. I didn't incorporate a hanger as I was making my ornaments, but it's probably not a bad idea. I'm going to use pretty coordinating ribbon to hang mine. I think it would work well to tie the end in a knot and put it in at one of the connection points along with some extra glue.


Wouldn't it be cool to use pictures as the paper?!?! Oh, I think I just came up with the idea for grandparent Christmas gifts this year!!!

Monday, October 11, 2010

LOVE this picture that Garret drew last year in Kindergarten! The way that he drew Gavin exactly the same as him only a little smaller - it just melts my heart! I hope he always likes his brother!!!


My friend, Angi, is the most awesome crafter!!! I love copying her ideas! These are made from a paper grocery sack. They hold all the papers that I am going to keep from school. These are for Kindergarten. I have a set made for pre-school and a set for first grade too and plan to make them for all the other grades. Add their picture (school picture if you're not too cheap to buy them like I am), the year, grade and teacher's name and it's the perfect way to hold the papers that you want to keep! These kindergarten packs were way too stuffed, so I added a velcro closure afterwards, but mostly it's just paper and a few stickers. And a shout out to Paula, who came up with hanging the ribbon in the middle center - just adds that little something that makes them extra cute!


Let there be lawnmowers

Anyone who has read my older posts, knows that many an interesting conversation has taken place in my car, amongst my kids. This Saturday may have been one of the best. We stopped at the drive-thru for some soda and the guy gave each of the kids a Sweet Tart sucker. I guess they've never had one before because they were quite excited. FREE CANDY! Doesn't take much more than that to excite my kiddos! So, here's my memory of the conversation...

Gavin: I wonder who was the inventor of these?!
Claire: God
Garret: Yah, cuz He made everything
Claire: Yah, like food and candy!
...continued talking about everything that God created...
(now here's the best part!)
Garret: I know how God made things. He just says like 'Let there be lawnmowers...and there are lawnmowers.'
Gavin: Yah, and 'Let there be suckers!'

Friday, October 8, 2010

Pumpkin Roll

A few years ago I started making pumpkin roll...and my husband started loving me all the more! This is kind of one of those "show off" desserts that aren't that hard to make but look like they are so everyone is super impressed. One of the first times I made one for a get-together someone said that it was so nice looking that they thought it was store bought. And I ain't gonna lie - I like me a compliment like that!!! So, I started making them for more and more get-togethers. The problem was that there were never any left-overs and Greg would get very upset that I made them for "everyone else" but not for him. So, now, whenever I make pumpkin roll, I can't make just one. I have to make at least 2. One for the get-together and one for Greg. Which I am happy to do since it makes him happy! And who doesn't want a happy husband, right? Not to mention, I get to eat some of the extra one too. So, over the years, making them in doubles all the time, I have developed a system down that works pretty good.

Don't be intimidated by the fanciness of this dessert. The only tricky part is getting the cake out of the pan after it's cooked. Other than that, it's a piece of cake (pun intended)! I've tried several different methods to prep my pan:
Cooking spray - didn't work - grrrrr
Crisco & waxed paper - waxed paper stuck to the cake - GRRRR
Crisco & flour - worked ok but dried out the cake more - eehhhh
"Baking" spray that house flour built in - worked great, but isn't cheap - humph

But, what I found that works the best of all and that I usually have on had is:
Plain Crisco put on VERY heavily, using a brush and making sure to get into all the edges very well.
I use a Pampered Chef baking stone that's 11x15. I think it's called the Bar Pan - it has sides like a normal cookie sheet. It is also WELL seasoned and very smooth. I wouldn't want to try this on one that wasn't.
The last trick for getting it out in once piece is to run something flat underneath the cake while it is still hot to make sure that it's all loose. I use a long offset spatula - the same one that I use for frosting a cake.

Pumpkin Roll

Cake:
3 large eggs
1 cup sugar
2/3 cup pure pumpkin (not pumpkin pie filling)
- I use 1/2 of a the smaller can 15oz for each cake so that I get 2 out of 1 can
3/4 cup flour
1/2 tsp baking powder
1/2 tsp baking soda
1-1/2 tsp cinnamon
1/4 tsp cloves
1/4 tsp nutmeg
1/4 tsp salt

Filling:
1 80z brick of cream cheese (do NOT use lowfat)
1/2 cup (1 stick) butter (do NOT use lowfat)
1-1/2 cup powdered sugar
1 tsp vanilla

Place eggs in bowl and beat on medium speed. Add sugar and beat on high until eggs are thick - about 3 minutes. While beating, combine flour, spices and salt in a separate bowl. Add pumpkin to eggs and mix to combine. Add flour mixture and stir slowly just until combined. You don't want to overbeat it and lose the "fluffiness" of the cake.
Pour into pre-greased pan, smooth with spatula and by wiggling the pan until it's evenly distributed. Bake at 375 for 12-14 minutes until it is just done. Do not overbake or it will be dry. Touch the top - it should spring back, but not stick to your fingers.
Place a thin "tea" towel on the counter and sprinkle with powdered sugar. After making sure that the cake is loose from the pan, quickly flip it out onto the towel. Sprinkle again with powdered sugar and roll up in towel.
After cake has cooled (about 30 minutes or more), prepare filling. Mix softened cream cheese and butter until well combined. Do not use lowfat or fat-free versions or the cream filling will be runny and not set up. Add powdered sugar and mix until well combined. Add vanilla and mix.
Unroll cake, spread filling, leaving about 1" at the short end that will be on the very outside edge (so the cake will "trap" the filling along the entire outside edge). Reroll - minus the towel! Sprinkle the outside with powdered sugar and wrap in saran wrap - the powdered sugar will stop the cake from sticking to the saran wrap. Refrigerate overnight (WAY in the back so your husband and kids won't find it and eat it all before you get a chance). Slice in 1/2" thick slices. Take to a get-together and prepare yourself for the compliments. :)
If you're making 2, make the cakes individually. Start the second batch when the first cake is done. By the time you're ready to pour it into the pan, the pan will have cooled enough to be ready for it. Be sure to heavily re-grease the pan again. Also, scrape any remnants of the cake from the pan before greasing it. Getting the second cake not to stick is trickier than the first. You can make the filling in a double batch and just split it between the cakes when they both have cooled.

Monday, September 27, 2010

Busy, but still cooking!

To my 9 loyal followers (LOL) please know that I have still been cooking and feeding my family and taking pictures of the meals I have made. I just haven't made the time to sit down and type them up yet.
Never fear, they will be here at some point!
Last week was an improvised week. Busy at the beginning, so I ended up skipping a grocery trip and making do with what we had. One night we had BBQ hotdog cups. Sounds pretty gross, but they were actually pretty tasty! Guess the inventive cooking gene doesn't fall far from the tree. Grandma Betty would have been proud!
This week's menu includes Chicken Pot Pie, Chili, Chili Dogs, Meatball Subs & Cheeseburger Pie. 9 packs worth of Handy Hamburger are already in the freezer just waiting to be used in these meals!
When I catch up I'll have pictures and recipes for Chicken Bundles too! Mmmmmmm!

Thursday, September 16, 2010

Walking Tacos

You've probably seen Walking Tacos at some sort of fair or festival. Kind of like a taco in a bag. Meat, cheese, etc put into a bag of Fritos or Doritos. Perfect for festivals because you can walk around while you eat them.
We've made these when we camped before. It's the perfect "opening night" meal. We had a crockpot of meat already cooked and just kept it hot all evening. Everyone arrived at different times and when they did, they could easily make up their own dinner.
We joked that tonight's version was more like "Sitting Tacos" because I was too cheap to buy the individual bags of Fritos. I bought one big bag and we ate them on a plate. No rocket science behind this recipe. Just easy and yummy. Great for a crowd!

Walking Tacos
Small bags of Fritos, Doritos or Tortilla chips
OR a large bag of the same chips, placed on a plate
Hamburger meat
Taco seasoning
shredded cheese
sour cream
salsa
shredded lettuce
tomatoes, olives, jalapenos, etc for toppings

Brown hamburger meat & drain. Add taco seasoning according to package directions.

To assemble - open chip bag and squeeze the bag to break up the chips into bite size pieces. Add a spoonful of meat and a sprinkle of cheese. Add other toppings as desired. Eat straight out of the bag or on a plate. Yum-Yum!!

I think these would also be good with a chili type meat sauce. Or even left over chili if it was thick enough. My kids love this either way but especially think it's cool to eat it out of the bag.

Sausage Gravy & Biscuits

No pretty picture tonight. Actually, not even a unique recipe. And the recipe that I will list is quite vague because I never measure my flour or milk. But, at the mild insistence of my friend Jenni, blog it I shall! Since this may just be one of my most frequently cooked meals, I guess blogging it is appropriate anyhow. My family LOVES sausage gravy and biscuits. More importantly, they love MY sausage gravy and biscuits. Everyone's comes out just a little different. I'm convinced it has something to do with the pan. My favorite - a cast iron skillet. Some kind of gravy-making magic happens on the bottom of a cast iron skillet that doesn't happen in a regular skillet. I'm not saying that gravy can't be made in a regular skillet. But somehow it just doesn't end up the same for me.
It took me several tries to get gravy figured out. I had some attempts where I'd put too much or too little flour or milk and it would end up like sausage soup or sausage glop. Once I didn't cook the flour long enough and it tasted really strange and floury. I've walked away at the wrong time and overcooked, even burnt the flour. I've put so much salt that it was barely edible. And I've burnt the whole mess. So, actually I think "several attempts" may be an understatement. Lots and lots of attempts would be more accurate.
So, here are the tricks that I've found through my many attempts.
1 - sausage - I like Bob Evans best, but will also use Tennessee Pride or Jimmy Dean if it's on sale. I don't care for Kroger brand (and most Kroger brand stuff I do like). Basically, you want a sausage that you like the flavor of and that cooks well, rendering a decent amount of grease without overdoing it. Brown the sausage until it is cooked through. Some people crumble their sausage. I use the back of a sturdy spatula to smoosh it onto the pan as I cook it, which makes the sausage really tiny.
2 - flour - sprinkle flour over the cooked sausage. Now, here's where I don't have an amount. I don't even have a guess at an amount. Start by lightly sprinkling flour over the sausage. Stir it up. If there's still "free" grease - the sausage or pan is still shiny with it - then add more flour. Cook the flour and sausage for a minute or so until it starts to brown lightly. This is part of the cast iron magic - the browned sausage and flour bits get stuck to the bottom and will later unglue themselves and make the gravy happen.
3 - milk - again, no measurement, but it depends on how much flour you added. As a general rule, I start by adding milk until it's just up to the underside of the sausage. The little sausage tops are still sticking up out of the milk. Start stirring, being sure to scrape the bottom of the pan well. This is where I also think that cast iron comes in handy. You don't have to be worried about scratching your pan or a special coating that is on it. Nothing worse than bits of teflon in your gravy!!! One rule with milk is that you can always add more to thin it out, but it's a lot harder to thicken it up if you add too much milk. Bring the gravy to a boil and boil for one minute. Remove from heat. If your amounts were right then you're good to go. If it's too thick then add some more milk, stir and reheat. If it's too thin then try cooking it longer...or call it sausage soup instead of gravy and pretend you made a new recipe.
4 - salt and pepper - sometimes I add this at the same time as the flour. Other times I add it at the end. You would think that the sausage would add plenty of flavor, but the flour and milk sort of wipe that out and more salt is needed.

That's how I make sausage gravy. As for the biscuits, I either use canned refrigerator biscuits, bisquick or I make these:

http://allrecipes.com/Recipe/JPs-Big-Daddy-/Detail.aspx

Only one tiny alteration - I don't do circle biscuits. I make one large rectangle out of the dough, then cut it into squares. One roll out, no leftover dough, tastes the same.

99% of the time at our house sausage gravy and biscuits is accompanied by scrambled eggs. One night I made this meal without the eggs - I think we were out - and the kids, Garret especially, were very upset. My kids usually put their eggs on top of their gravy, which is over a crumbled biscuit. Sometimes they make a little sandwich with it all. And we always bring the butter, jelly and honey to the table to enjoy on the extra biscuits. Without fail, when I make this meal the kids pour on the compliments!

Friday, September 10, 2010

Crab Salad


My Grandma Betty (my mom's mom) was an "inventive" cook. That's putting it nicely. To give you an idea of her inventiveness, one Christmas dinner she dyed pineapple rings red...which wouldn't be too bad in itself...but to up the festiveness of the dish, she added cottage cheese that she had dyed GREEN! Yes, she served us green cottage cheese. Ew! I've always joked that while some people subscribe to the theory of "less is more", my Grandma Betty wasn't buying it. To her it was always "MORE is MORE"! So, if you had a dish that was tasty, there just had to be something that you could add to it to make it even MORE tasty. For example, knowing her tendency toward strange dishes, yet also being sensitive to her desire to contribute to our holiday meals, one Thanksgiving that I was hosting I asked her to bring good old Macaroni and Cheese. You can't mess up mac-n-cheese, right? You take some mac, you take some cheese - viola! Mac-N-Cheese! Simple, delicious, always a hit - right up there with mashed potatoes in my book. Well, Grandma Betty, being who she is, KNEW that she could improve on this dish that has stood the test of time. And the best way to improve on plain, old, boring (delicious) macaroni and cheese was to add mixed vegetables to the mac and the cheese. Yes, I said mixed vegetables! And not just peas, corn and carrots, which would have been gross enough. She added what I think is called "winter blend" - cauliflower, broccoli and carrots. To macaroni and cheese! Eww!!!! Take this stuff back and give me some green cottage cheese!! I think my dad (being one not to want food to go to waste) ate some of it. The rest of us put some on our plates, pushed it around and threw it out.
All that being said, Grandma Betty's inventive cooking did occasionally result in something that tasted really good. The problem was that she would never make this good dish a second time. She always had to up the ante and good often turned into not-so-good. One of the dishes that she invented that we all really loved was crab salad. Greg hovered over the bowl and inhaled it as quickly as he could. If you are wondering whether or not this dish got changed (and therefor ruined) the answer, to me and Greg anyhow, is YES! One time she added chopped celery. YICK! We'll eat celery by itself or dipped in ranch or with peanut butter on it, but please do not chop it up small and put it in anything, cooked or raw, but especially raw. I think Greg took it a little personally and was almost insulted when that celery invaded his beloved crab salad. He saw it on the counter and was anxious for that first bite, only to have it ruined by the crunch of celery. I sympathized and was determined to recreate the GOOD version of crab salad.
We love this Crab Salad. I never thought it was anything special until my friend, Angi, was over with 2 of her kids (Hi Zander and Ava!!!) and they all loved it enough that she wanted the recipe and made it for her family the next night. I had always made it as a snack type thing where the kids and I would have a small portion of it and then Greg would make several trips to the fridge until it was gone. But recently I decided that it was dinner worthy. Add some crackers and it's a meal. Maybe not a super well rounded meal, but a meal that fills your tummy and tastes good! You got plenty of protein and pickles count as a veggie, right? Ether way we enjoyed it tonight and are still quite full 3 hours later.

Crab Salad
(can be doubled)

1 8oz pack of imitation crab - chunk or "leg", chopped into small chunks (this is the stuff that sold in a flat plastic package - at Kroger it's in the bins that are in front of the real seafood display)
6 hard boiled eggs, peeled and diced
3 large dill pickle spears (I prefer Mt. Olive), diced
- keep the jar out to add some pickle juice
1/4 onion, finely chopped
1/2 cup mayonnaise (I prefer Hellmans)
1 tsp prepared yellow mustard
1 tsp dill - dried
salt, pepper, garlic powder and onion powder to taste
Dash (about 2tsp or so) lemon juice

Mix all ingredients. Taste and adjust spices as needed. I usually add some extra pickle juice to give more dill flavor and loosen up the "sauce". Cover and chill. You can eat it right away but it's one of those that tastes different after the flavors blend together overnight. Serve alone or with crackers (I like Club crackers).

This is pretty much the exact same recipe that I use for tuna salad, egg salad, chicken salad, potato salad, etc, minus the lemon juice. Once I tried making an egg salad recipe that I found online. It was similar, but didn't have any dill pickles. After we ate it I asked Greg what he thought. He said, "It's good, but it's missing something." Knowing what it was, I asked, "Pickles?" and he agreed right away. We like us some dill pickles in the Fraley household! Greg had the kids drinking dill pickle juice from the jar before they were 2 years old. They fight over who gets to drink it now! Our vacation to Florida at spring break was almost ruined when I opened the back hatch of my truck after going to the grocery and the economy size jar of dill pickles fell and shattered on the ground. Greg was very upset with me and I know it was not because of the mess or the waste of money - it was because he had plans to eat those pickles one by one, throughout our vacation. We still had a nice vacation, but it was definitely tainted by the lack of pickle! :P

Little Cheddar Loafs & Mashed Potatoes


Yes, that is a carb with a carb. We had leftover peas and rice from Sunday and I wanted to use them up. Actually, peas, rice and mashed potatoes mixed together is pretty tasty!

This recipe is from a cookbook that my mother-in-law has. While we were building our house, for a little over a year, we lived with my in-laws. Sometimes she would make a big dinner for all of us. One night she decided to try a new recipe and we all loved it. After we moved out I called up to get a copy of this one and have made it several times since.
These freeze very well...just leave off the sauce. You can put layers of waxed paper in between them, place in a large freezer baggie and using a straw, suck out as much of the air as you can. You can thaw them before cooking or you can cook the frozen meatloafs a little longer. They are also good on the grill!

Little Cheddar Loafs

1 egg
3/4 cup milk
1 cup shredded cheddar
1/2 cup cooking oats
1/2 cup chopping onion
1 tsp salt
1 lb lean ground beef

Sauce:
2/3 cup ketchup
1/2 cup brown sugar
1/2 tsp prepared yellow mustard

Place all ingredients, except sauce ingredients, in a bowl and mix well. You might as well use your hands because they are gonna get messy making the loafs anyway. Shape mixture into 8 little loafs and place in 9x13 pan. Stir together sauce ingredients. Spoon over meatloafs. Bake uncovered at 350 for 45 minutes.

You can leave the sauce off if you don't like it. Or you could use plain ketchup. The sauce tastes like a sweet BBQ. I think it's good and my kids LOVE it.

Now, here's a little trick I figured out. Use the leanest beef you can afford. I usually buy ground chuck for everything, especially for this. But not matter what, when you pull the pan out of the oven, there will be grease on the bottom. Rather than letting the little fellas sit in the grease, move all the loafs to one side of the pan and prop that end up with something (a wooden spoon, a trivet, anything that can handle the heat). All the grease will drain to the other end and your meatloafs will be safe at the top! That's about as healthy as my cooking gets folks! :)

See all the grease pooled at the bottom side


Definitely in my top 10 and probably top 5 favorite foods is mashed potatoes. So yummy!!! Greg's Mamaw made mashed potatoes with almost every meal. I think we even had mashed potatoes with lasagna. You didn't find me complaining though! But I did complain about the onions. Fraley men eat onions like some people eat apples. They slice them into wedges and eat them raw. Ewwww!!!! I like onions, but raw onions, by themselves, as a treat?!?! Glleeeeeech! And you can imagine the breath afterwards.
But back to the yummy potatoes! Mamaw always made mashed potatoes in a pressure cooker. The only pressure cooker that my mom ever used was for canning and I did not know the wonders of the pressure cooker at that point. But, Mamaw, being the wonderful, caring woman that she was, decided that I needed a pressure cooker so that I could make mashed potatoes too. And when Mamaw decided that you needed something, you got it! So, next thing I knew, I was the proud owner of a pressure cooker and she was teaching me how to make my beloved mashed potatoes!
If you've never made mashed potatoes in a pressure cooker, then you're missing out! Or, if you're like my dear friend, Amanda, and have a pressure cooker that you've never used because you weren't sure how, well, now's the time to break it out!!! The biggest benefit to pressure cooking potatoes - TIME!!!! Other benefits are that you can easily make a HUGE batch at once, all the potatoes cook evenly without burning or sticking to the bottom, you don't have to cut the potatoes into tiny chunks and you don't waste any of their yummy goodness in the water that has to be poured off when you boil them in a regular pot.
My other secret to the yummiest mashed potatoes every is CREAM CHEESE!!!! Mmmmm...don't they already sound yummy?!?! Show me a recipe with cream cheese in it and I'll show you a recipe that I love!!! My Aunt Melanie turned me on to this trick and I've never turned back. Along with the cream cheese is butter and salt. So basically you take a naturally fat free (I think) food and add a bunch of fat to it so it tastes delicious (note how I used a descriptor other than "yummy", even though yummy pretty much sums it up)!!!

I'll write this recipe as if you have a pressure cooker, but have never used it. If you know how to use a pressure cooker then just pick out the good parts. If you don't have a pressure cooker, then just use the cream cheese trick for the yummiest mashed potatoes EVER!!! You can even add it to instant potatoes - would Sandra Lee qualify that as "semi-homemade"?


Mashed Potatoes

Potatoes - as many as your pressure cooker will hold - mine holds 8 lbs
Water
Salt
Pepper
Butter
Cream Cheese
Milk

Most/All pressure cookers have some type of disk that fits into the bottom of the pan. This is to keep the food from burning on the bottom of the pan. Place the disk in the bottom of the pan and fill with about 1" of water. You can use more water if you want, but you don't have to. Peel and slice the potatoes. Here's awesome thing #1 - all you have to do is cut the potatoes into slices about 1/4" thick. No tiny little even chunks. Just quick slices. Some pressure cookers have a "max fill" line, others like mine can be filled right up to the brim. If you are going to go to the trouble of making potatoes, why not make as many as you can, right?

After the pan is full of sliced potatoes add a generous amount of salt and pepper right on top. Close the lid - it will have a seal and somehow lock into place. Mine has an arrow that you line up and then twist the lid onto the pan. There is also the valve cover thing - make sure this is in place properly. Most/All of them sit on top of the valve and are just held in place by weight.
Cook the potatoes over high heat, with the lid sealed shut. As pressure builds, many cookers have a locking mechanism so that you cannot open them and get hurt. If water is boiling out the sides then you do not have it sealed properly. Let it cook until it's unlocked (or run under cold water), fix the seal and try it again.
OK, here comes the next great thing - after the valve cover things starts to jiggle, turn down the heat to medium-low and cook for 5 minutes! That's all - just 5 minutes under pressure!!!
After the 5 minutes of cooking is done, CAREFULLY place the entire pot under cold running water until the pressure is released, the locking mechanism releases and if you tip the valve (carefully) no steam/pressure escapes.
Open the lid. Drain the potatoes - I use the lid to hold the potatoes in while the water drains.
Now, to mash - you can do this by hand in the pan or with a mixer. I use my Kitchen Aid mixer and a full load just barely fits into the bowl. Mix, on low speed, adding butter, cream cheese, milk and more salt and pepper. The amounts are up to you. For an 8lb bag of potatoes I use a full stick of butter, 8oz of cream cheese, enough milk to get the right consistency and salt and pepper to taste.
I split 8 pounds of potatoes into 3 batches...had one for dinner and froze the other 2 in gallon ziplock freezer bags.
Gallon Ziploc Bags are great for the freezer -
they lay flat, stack nicely and take up minimal space!